The Elevation Profile offers so much more than just analyzing the difficulty of hills. Interacting with the profile allows you to make selections, place cues, create segments, trim the route, change the color of a route, and more.
Outline:
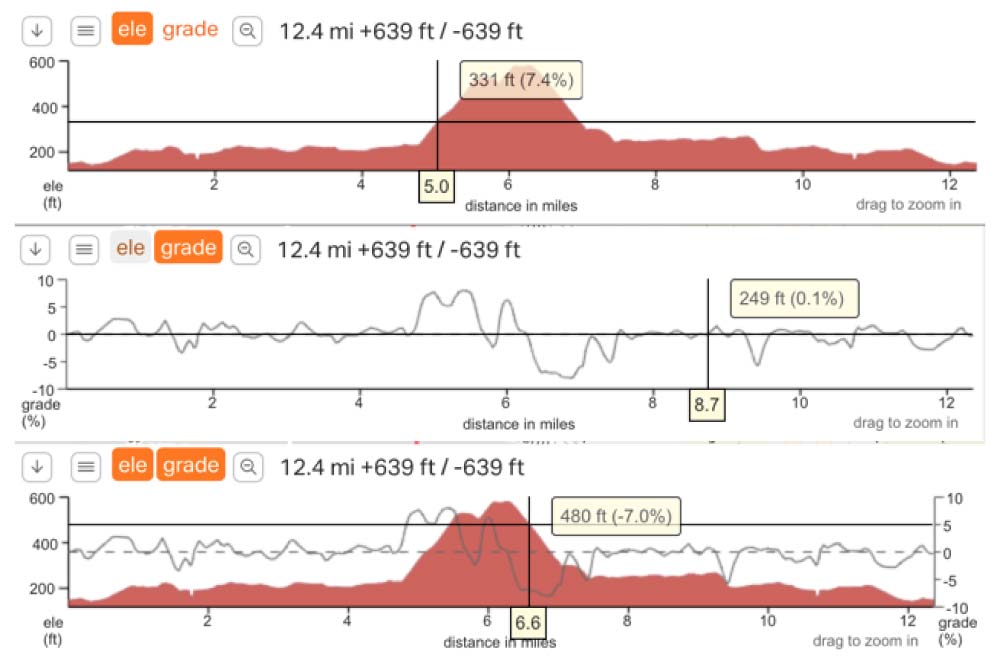
Mouse-Over:

Elevation and Grade Buttons
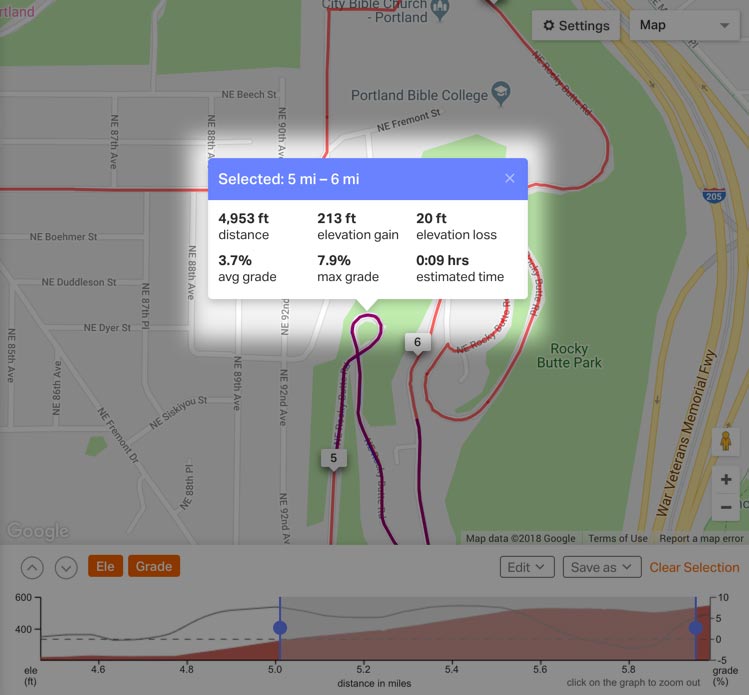
Making a selection:
Making a selection on the elevation profile allows you to take advantage of so many functions.
- Click and drag across the elevation profile to select a section. This will zoom-in on your selection.
- Refine the selection by dragging the handles on the opposite ends of the selection box.
- Click DESELECT to clear your selection.
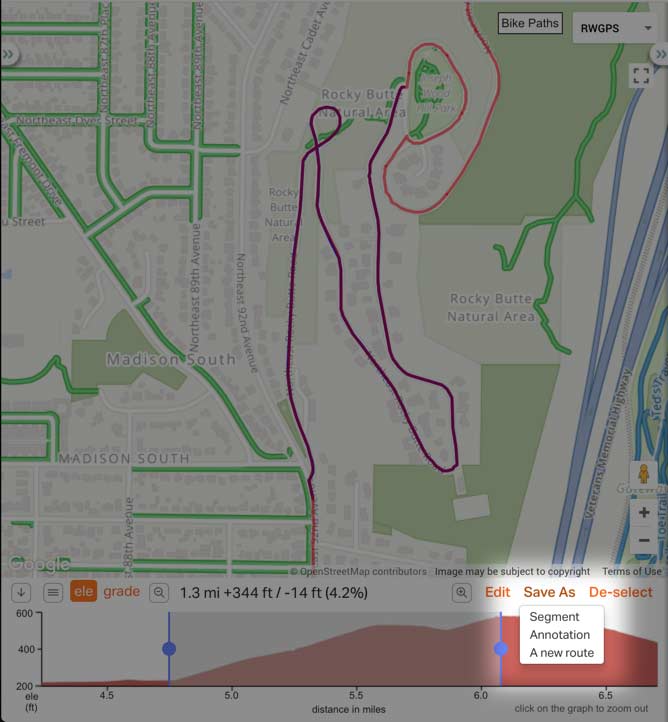
Save As
These options are available after making a selection on the elevation profile.
- New Segment A segment is section of a route that compares ride times agains other riders. If the segment is marked private, it will only be compared to your own efforts and will not be seen by other riders.
- Annotation Save a note about a section of a route (ex: “Gravel road for 2 miles”). Annotations will appear in a tab in the left side panel.
- New Route This feature is for Premium subscribers. It is also covered in the Combining and Splitting Routes article. Any part of the route that has been selected and saved into a new route will include the cues of the selection.
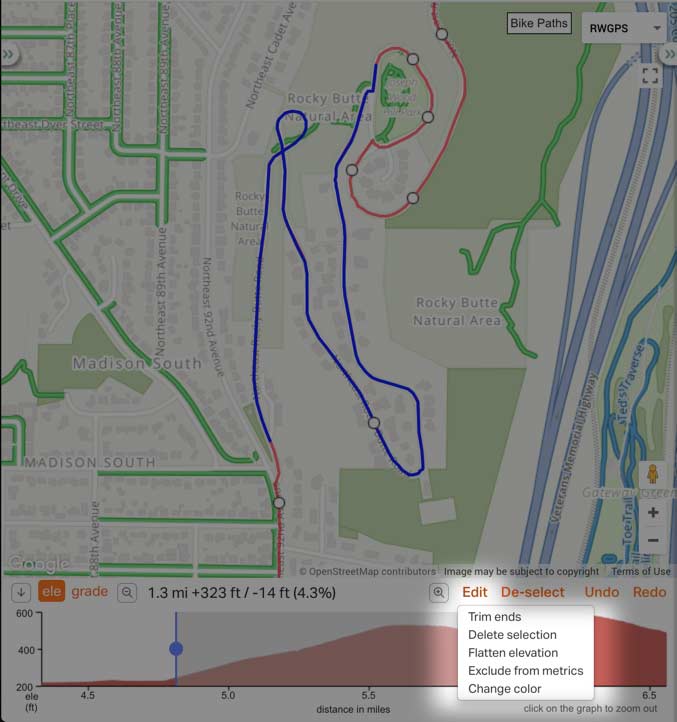
Edit:
While viewing or editing a route, you can make a selection to bring up the EDIT menu. This is located just above the elevation profile.
These features are only available for Premium subscribers.
- Trim Ends If you had a delay at the start and/or end of your ride, you can make a selection, click Edit, then Trim Ends.
- Delete Section This will delete the selected section, which is great for cutting a portion to reroute.
- Flatten Elevation Use this to fix dips and spikes that can be caused by bridges and tunnels. See Flatten Elevation for more info.
- Change Color Allows you to change the line color of the selection which can be done with a whole route or just a section. See the Change Color article for more info.
Adding Custom Cues
First, click ADD TO CUESHEET, then point the mouse over the elevation profile, a blue dot will appear on the map corresponding with the location. Click on the elevation profile to see the Custom Cue dialog box appear on the route.
Learn more about Working with Cues.
