Challenges are flexible and accessible opportunities to motivate and engage your base, no matter where in the world they may be. Challenges are free for all Clubs, Event, and Tourism account holders and free for all participants.
Jump to:
- Creating a Challenge
- Editing a Challenge
- Overview Page
- Edit Details
- Challenge Settings
- Participation Type
- Challenge Criteria
- Milestones
- Rules Card
- Preview and Share Card
- Leaderboard
- Participants
Creating a Challenge
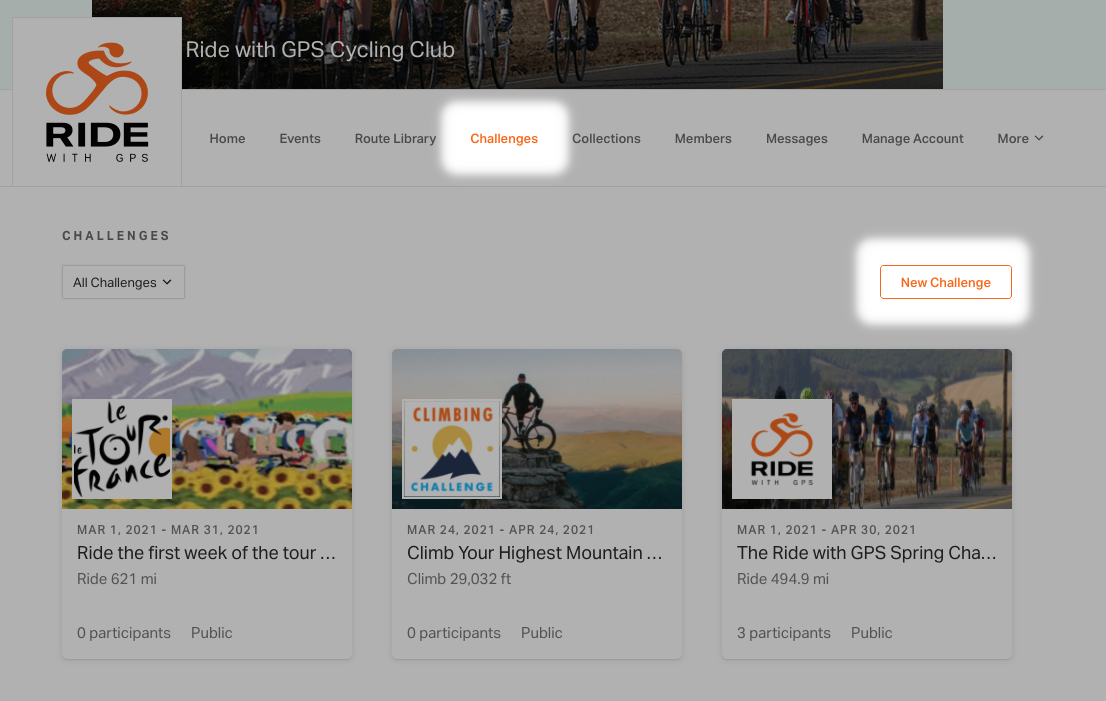
- Sign into Organization.
- Click the Challenge tab, then click New Challenge.
Viewing or Editing an Existing Challenge
- Sign into the Organization
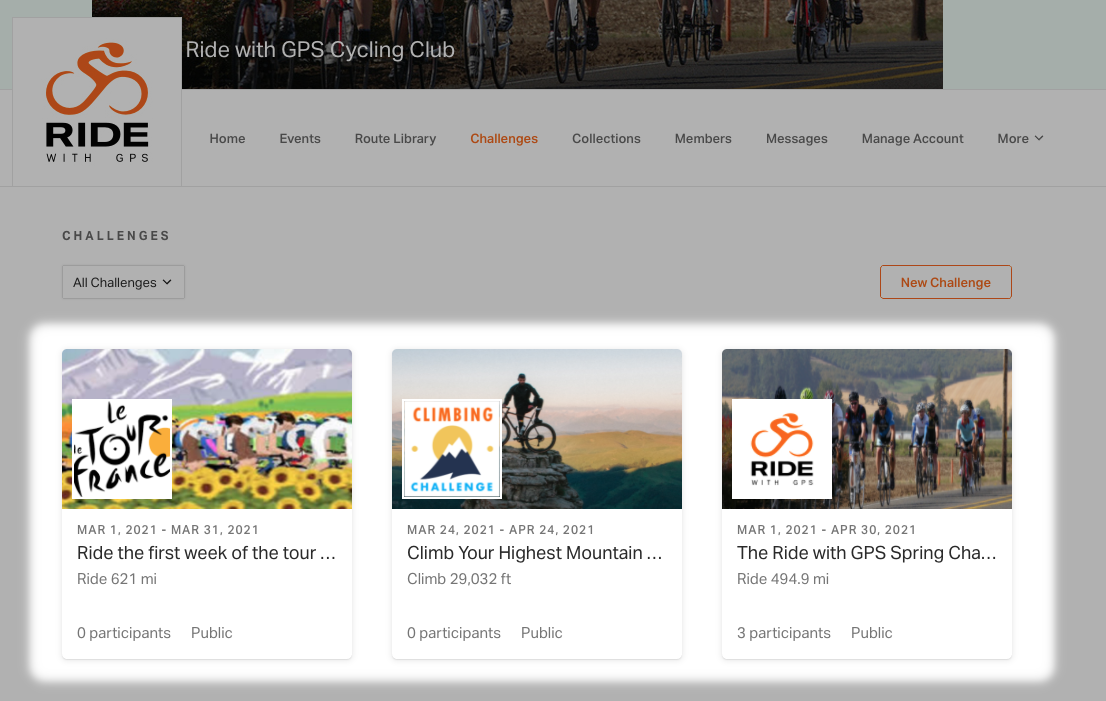
- Click the Challenge tab
- Click on any Challenge you’d like to view or edit
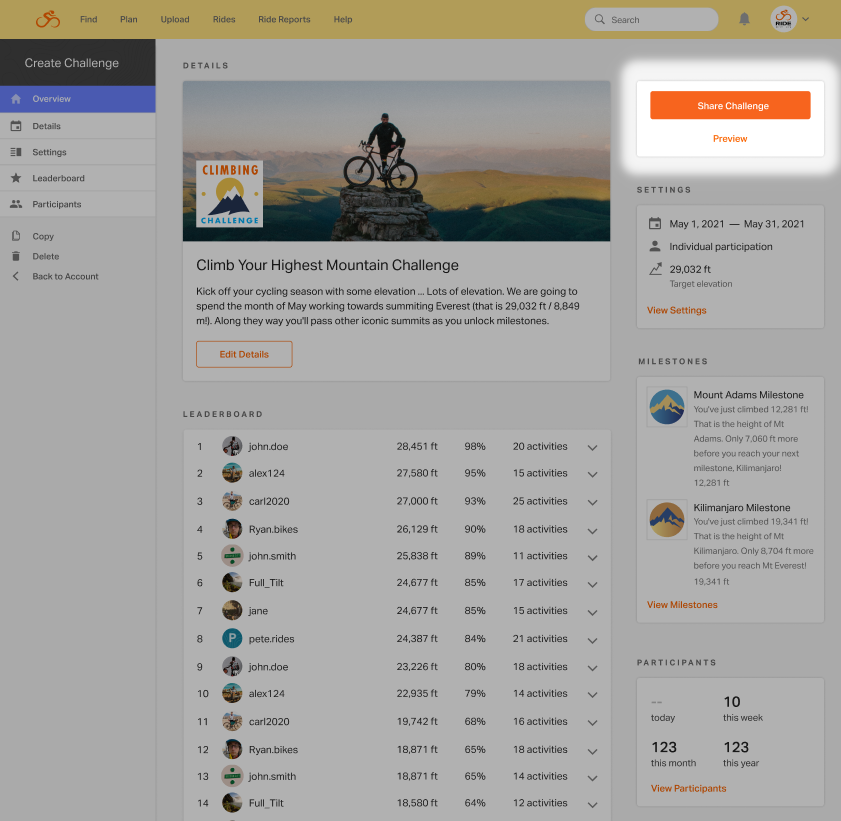
Overview Page

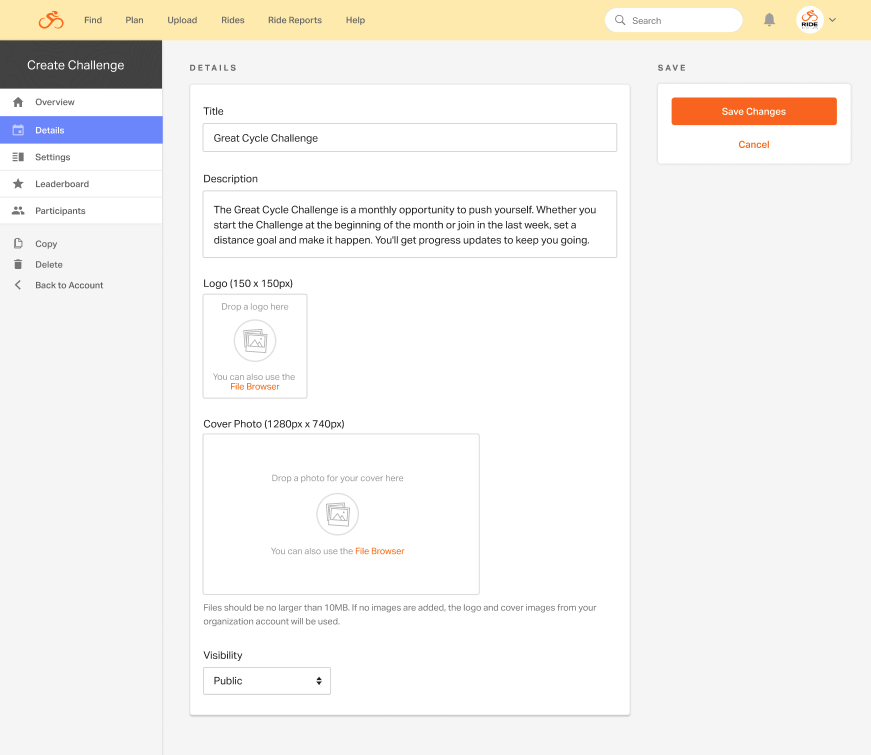
Edit Details
- Give the Challenge a title
- Add a description explaining your Challenge to your participants. (Note: URLs and email addresses will automatically be detected and turned into hyperlinks for participants.)
- Upload a logo and cover image to brand your Challenge
- Set the visibility of the Challenge. Challenges can be public, members only, or managers only (which means access will only be given to those you share the link with).
- Click Save to save your information
Challenge Settings
- Start by giving your Challenge a start and end date
- (Optional) You can require that for activities to be counted they must have a specific hashtag added to the activity title (e.g. #rwgpschallenge)
- Choose whether you want to allow manually created rides or not. If you choose no, only rides recorded with Ride with GPS app or a GPS device will be permitted.
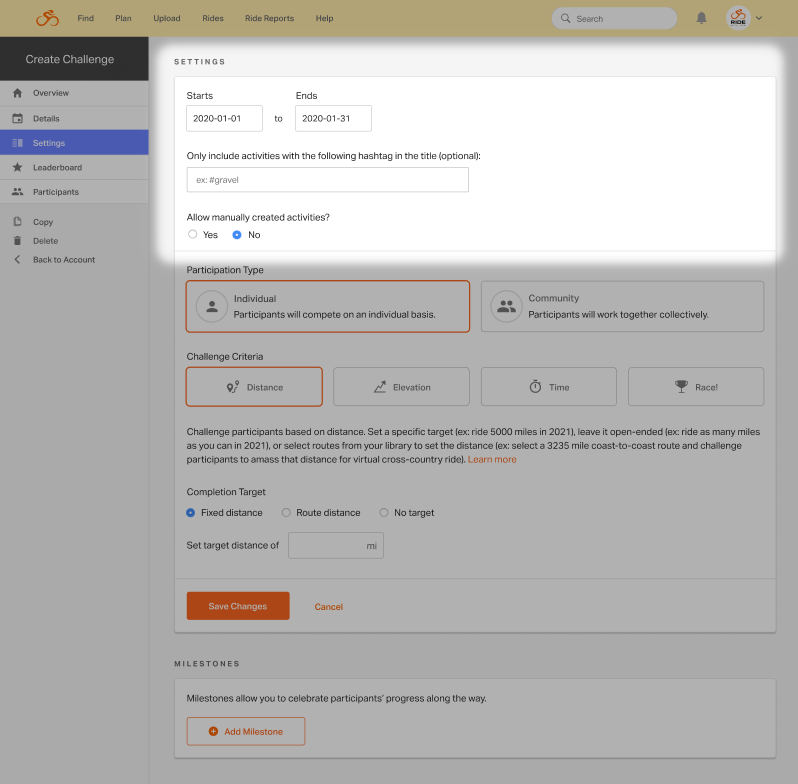
Participation Type
- Individual – Participants will compete on an individual basis trying to hit the Challenge target for themselves. (e.g. Ride 300 miles in the month of May)
- Community – Participants will work together to try and hit the Challenge target. (e.g. Try to ride 5000 miles in the month of May using all participants’ combined mileage)

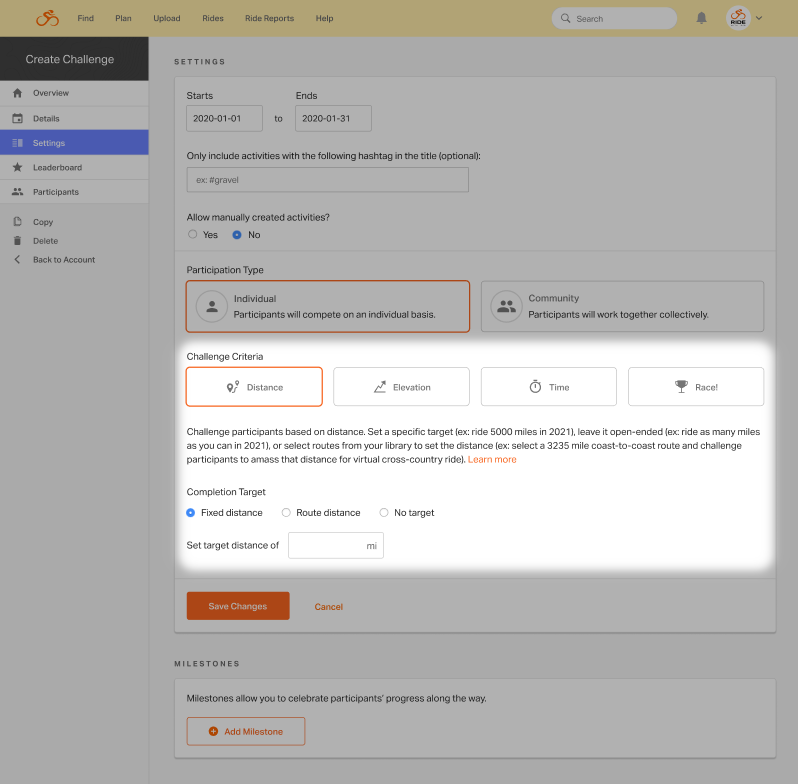
Challenge Criteria
- Distance – Challenge participants based on distance. Set a specific target (ex: ride 5000 miles in 2021), leave it open-ended (ex: ride as many miles as you can in 2021), or select routes from your library to set the distance (ex: select a 3235 mile coast-to-coast route and challenge participants to amass that distance for virtual cross-country ride).
- Elevation – Challenge participants to climb. You can set a target elevation gain (ex: climb 20,000m in April) or leave it open-ended (ex: climb as much as you can in April).
- Time – Challenge participants to spend more time riding. You can set a target time (ex: ride for 500 hours in April) or leave it open-ended (ex: ride as much as you can in April). Note: Only moving time will count towards the Challenge, not total time recorded.
After you select the metric type for your challenge, you can choose a completion target. Riders will be ranked on the Challenge leaderboard based on their ride totals.
- Fixed target – Fixed target allows you to set a specific distance, elevation, or time as the target that participants strive to reach with every ride.
- Route distance (distance Challenge only) – Route distance allows you to upload a route from your route library. Every ride participants do that meets your Challenge settings will show their progress along the route. Only one route can be added, but you can easily combine multiple routes together in the route planner to make one long route.
- No Target – No target is an open ended Challenge where riders see who can ride the most distance, elevation, or time.
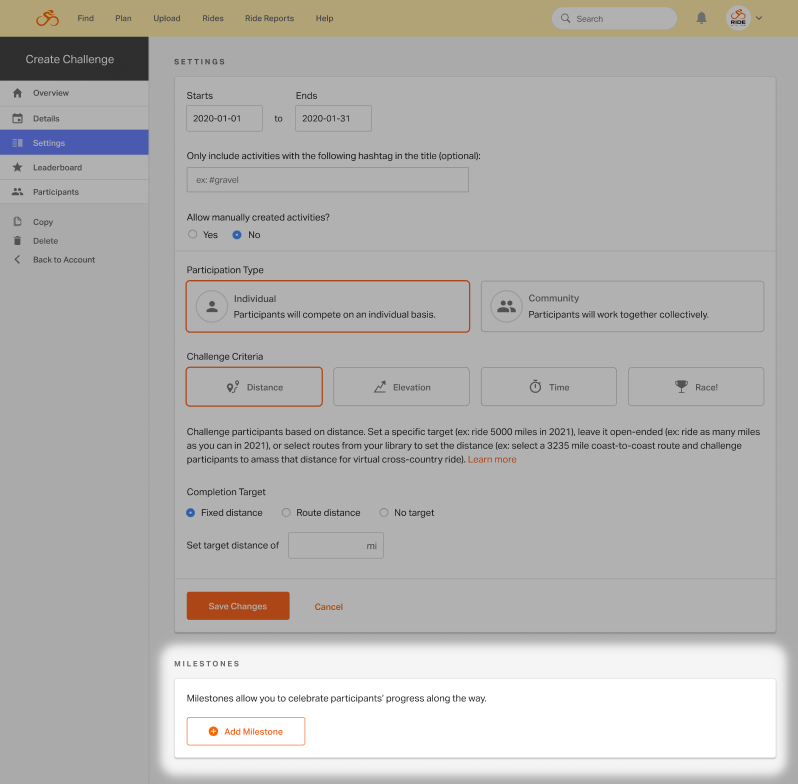
Milestones
- After setting your Challenge criteria and saving, click Add Milestone
- Enter a Milestone title (e.g. “Mt Hood Milestone”)
- Enter a Milestone overview (e.g. “You just climbed 11,250ft! That is the elevation of Mt Hood. Only 4,500ft till your next Milestone for Mt Blanc!”)
- Choose whether to base your Milestone off a set target (e.g. 500 miles) or a percent of your overall Challenge target. (note, all subsequent milestones will use the same setting)
- Choose to upload a custom badge or choose one from our library.
- Click Save to save your Milestone.
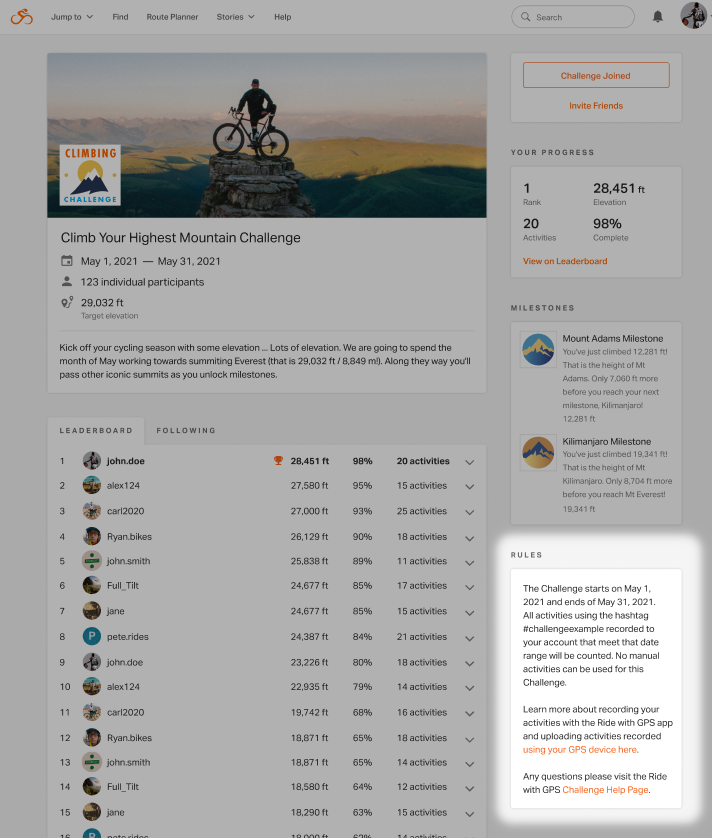
Rules Card
Preview and Share Card
When you are ready to share your Challenge make sure to include a link to the Challenge Participant page. This page covers all the information riders need to join and participant in a Challenge.
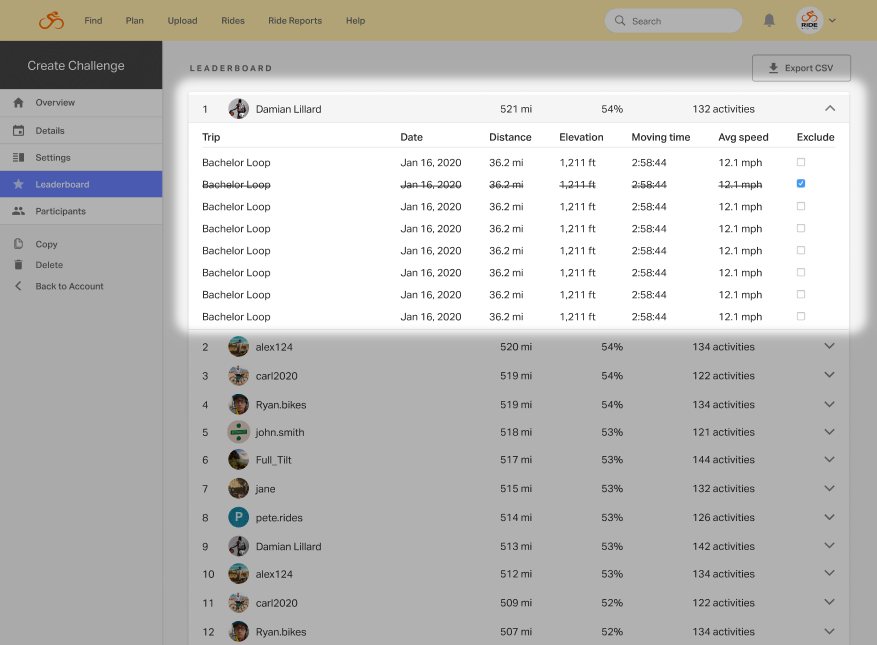
Leaderboard
If a member or participant’s activity is private, you’ll be able to see the activity stats, but not the name or date of the activity. You will not be able to click through to the full activity.
You can export your Challenge leaderboard information. This will include name, email, and Challenge stats for the participant. This information is only intended for communicating information relevant to the Challenge.
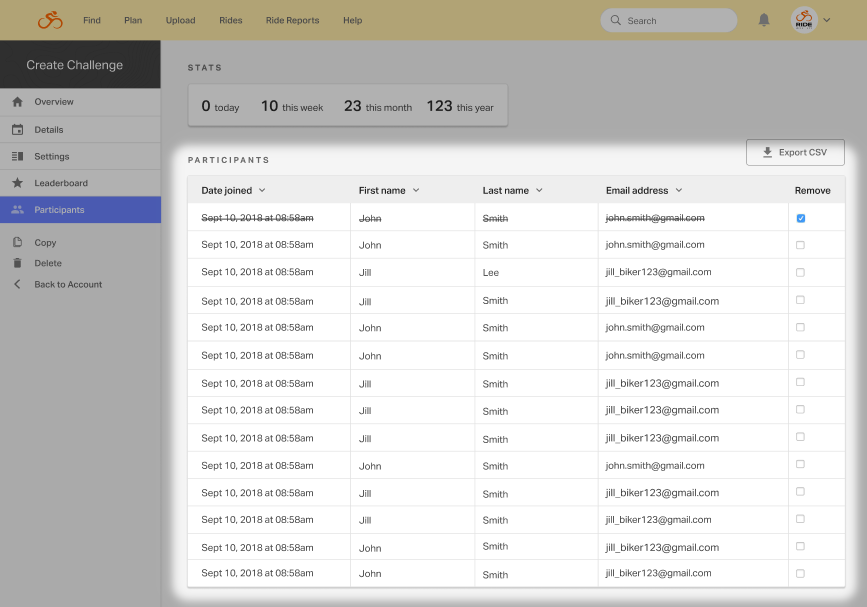
Participants
You can export your Challenge leaderboard information. This will include name, email, and Challenge join date for the participant. This information is only intended for communicating information relevant to the Challenge.