Get the most out of routes purchased from the Adventure Cycling Association with Ride with GPS. Using the advanced editing tools available with a Premium subscription, you can combine an ACA route file with the corresponding ACA Services(Points of Interest) file, download your route map for offline use, navigate, and record your rides. Here’s how:
Outline:
- Upload the GPX track file
- Upload the Services GPX file
- Rename the Services route
- Edit the GPX track file
- Combine the GPX Track with the Services
Part 1: Upload your .gpx track to Ride with GPS
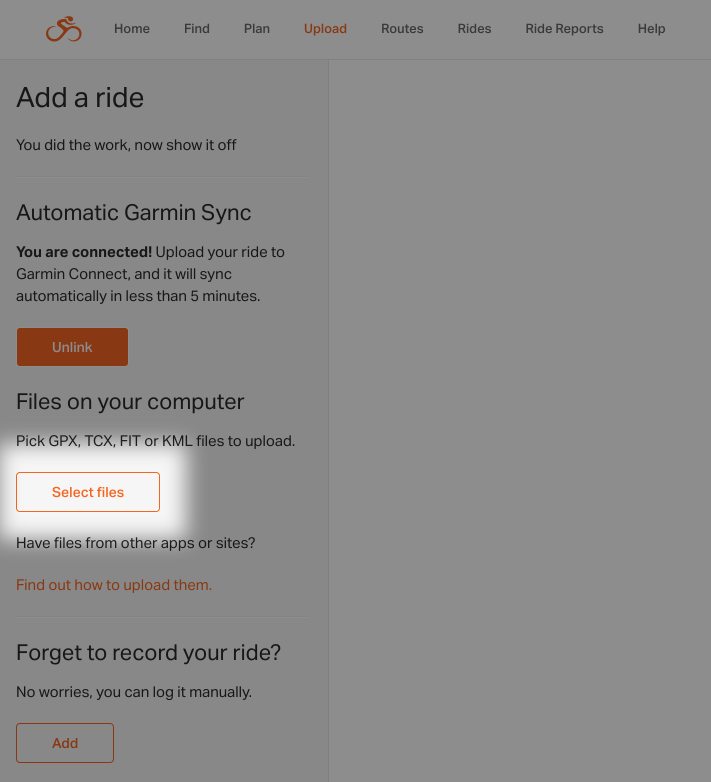
- Click on the “upload” tab on the left hand side of the Ride with GPS dashboard
- Click the “select files” button
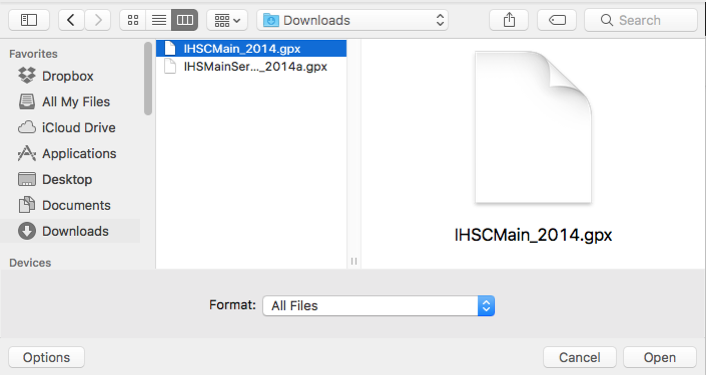
- Locate your two ACA files, and select the file that does not have “services” in the file name.
- The file may upload to Ride with GPS as a ride, but to use as navigation we need to change this to a route.
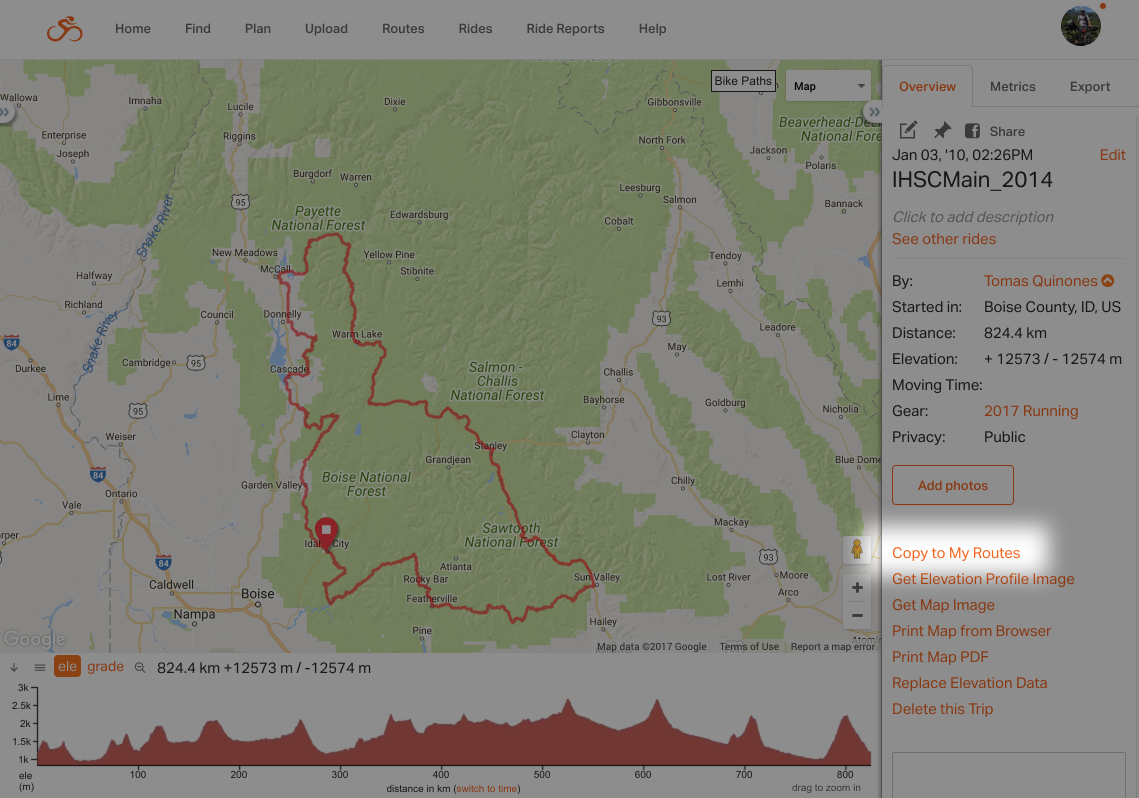
- Click on the uploaded ride name to open it.
- Click the COPY TO MY ROUTES link on the right side of the page to save this ride as a route
- After a couple of seconds, you’ll get prompted to VIEW or EDIT the copied route. At this point, you are ready to move on to Part 2.
Wait for 60 seconds after this step to allow your newly created route to be saved and indexed on the Ride with GPS servers, then it will start to show up in search results.

Part 2: Upload your “services” file to Ride with GPS
- Click the “upload” link at the top of the Ride with GPS page
- Click “select files”
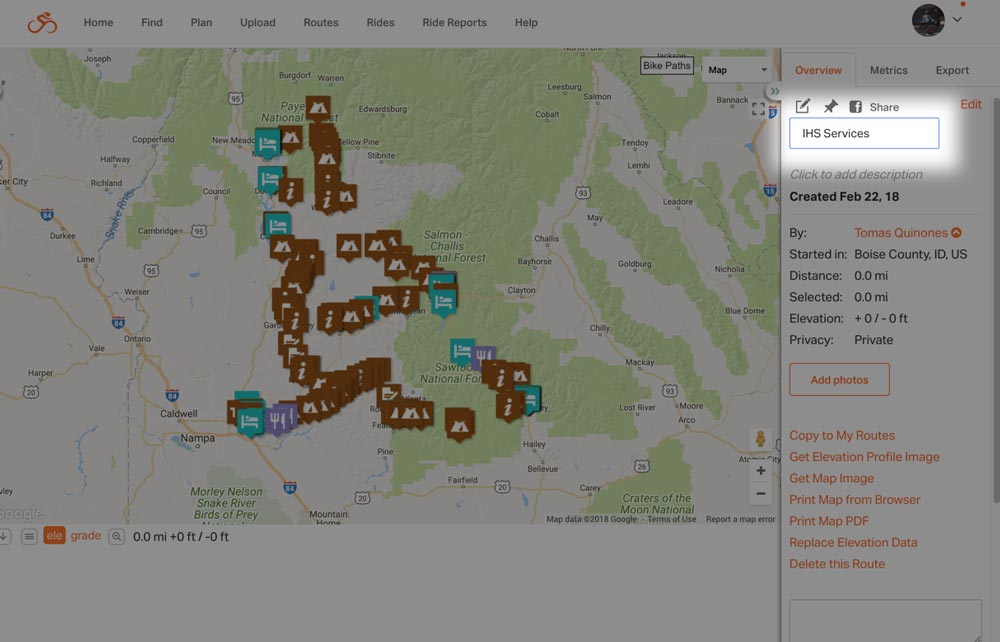
- This time you are going to select the file with “services” in the name. This file contains all the POIs for the route.
- The uploaded file will say that it is 0 miles long. This is expected for the “services” gpx file. Click VIEW ROUTE to load the POIs onto the map.
- Rename the services file to make it easier to find in one of the next steps. From the route viewer, click (unnamed) and give a name similar to the route but with “services” in the name.
- In this example I’ve renamed it from (unnamed) to IHS Services.


Part 3: Combining the route with the services
- Go to ROUTES and open the route file that was uploaded earlier.
- Click EDIT to put the route in edit mode.
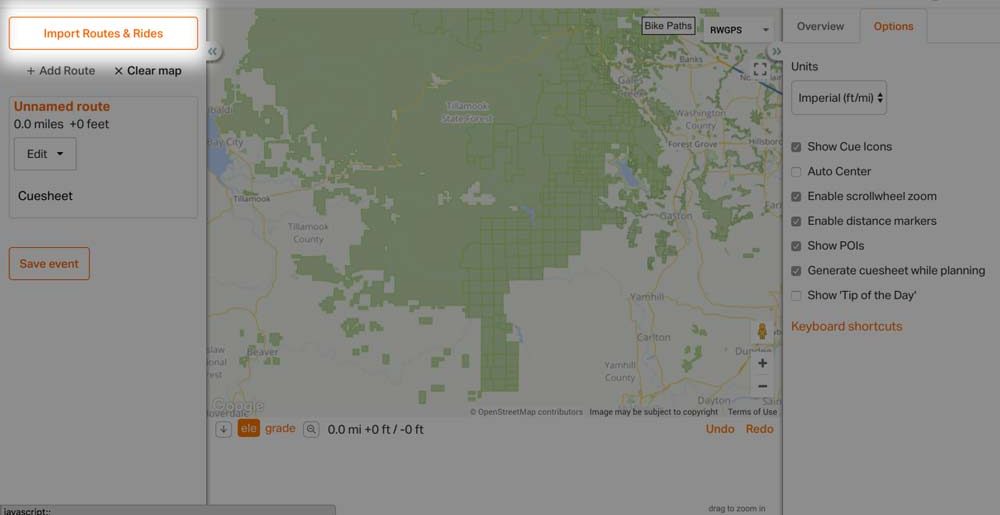
- Click the “Import Routes and Rides” box on the upper left of your screen
- Enter the first few letters of the services file you uploaded from ACA.
- You’ll see the name appear. Click on it to finish loading the services.
- You will now see your route combined with all the services POIs.
- Click the “save” button in the left side panel.
- This will open a pop up where you can add a new name for your completed route, choose privacy settings, and other details.
- Click “save” at the bottom of the pop up when you have finished naming your route and choosing settings
- Your ACA route with services POIs will now be available to you when you click ROUTES on the top menu.
Now you are going to combine the route file with the POIs of services.
You must be a Premium subscriber to see this option.

Now that you have your complete ACA route saved on Ride with GPS, you can use it on your iPhone or Android device with the Ride with GPS mobile app. Using the app, you can download your route for use Offline and take advantage of voice navigation features.